> ## Documentation Index
> Fetch the complete documentation index at: https://dripart-train-lora-docs.mintlify.site/llms.txt
> Use this file to discover all available pages before exploring further.
# Recraft Text to Image API Node ComfyUI Official Example
> Learn how to use the Recraft Text to Image API node in ComfyUI
The [Recraft Text to Image](/built-in-nodes/api-node/image/recraft/recraft-text-to-image) node allows you to create high-quality images in various styles using Recraft AI's image generation technology based on text descriptions.
In this guide, we'll show you how to set up a text-to-image workflow using this node.
To use the API nodes, you need to ensure that you are logged in properly and using a permitted network environment. Please refer to the [API Nodes Overview](/tutorials/api-nodes/overview) section of the documentation to understand the specific requirements for using the API nodes.
If you find missing nodes when loading the workflow file below, it may be due to the following situations:
1. You are not using the latest Development (Nightly) version of ComfyUI.
2. You are using the Stable (Release) version or Desktop version of ComfyUI (which does not include the latest feature updates).
3. You are using the latest Commit version of ComfyUI, but some nodes failed to import during startup.
Please make sure you have successfully updated ComfyUI to the latest Development (Nightly) version. See: [How to Update ComfyUI](/installation/update_comfyui) section to learn how to update ComfyUI.
## Recraft Text to Image API Node Workflow
### 1. Download the Workflow File
The workflow information is included in the metadata of the image below. Download and drag it into ComfyUI to load the workflow.

### 2. Follow the Steps to Run the Workflow
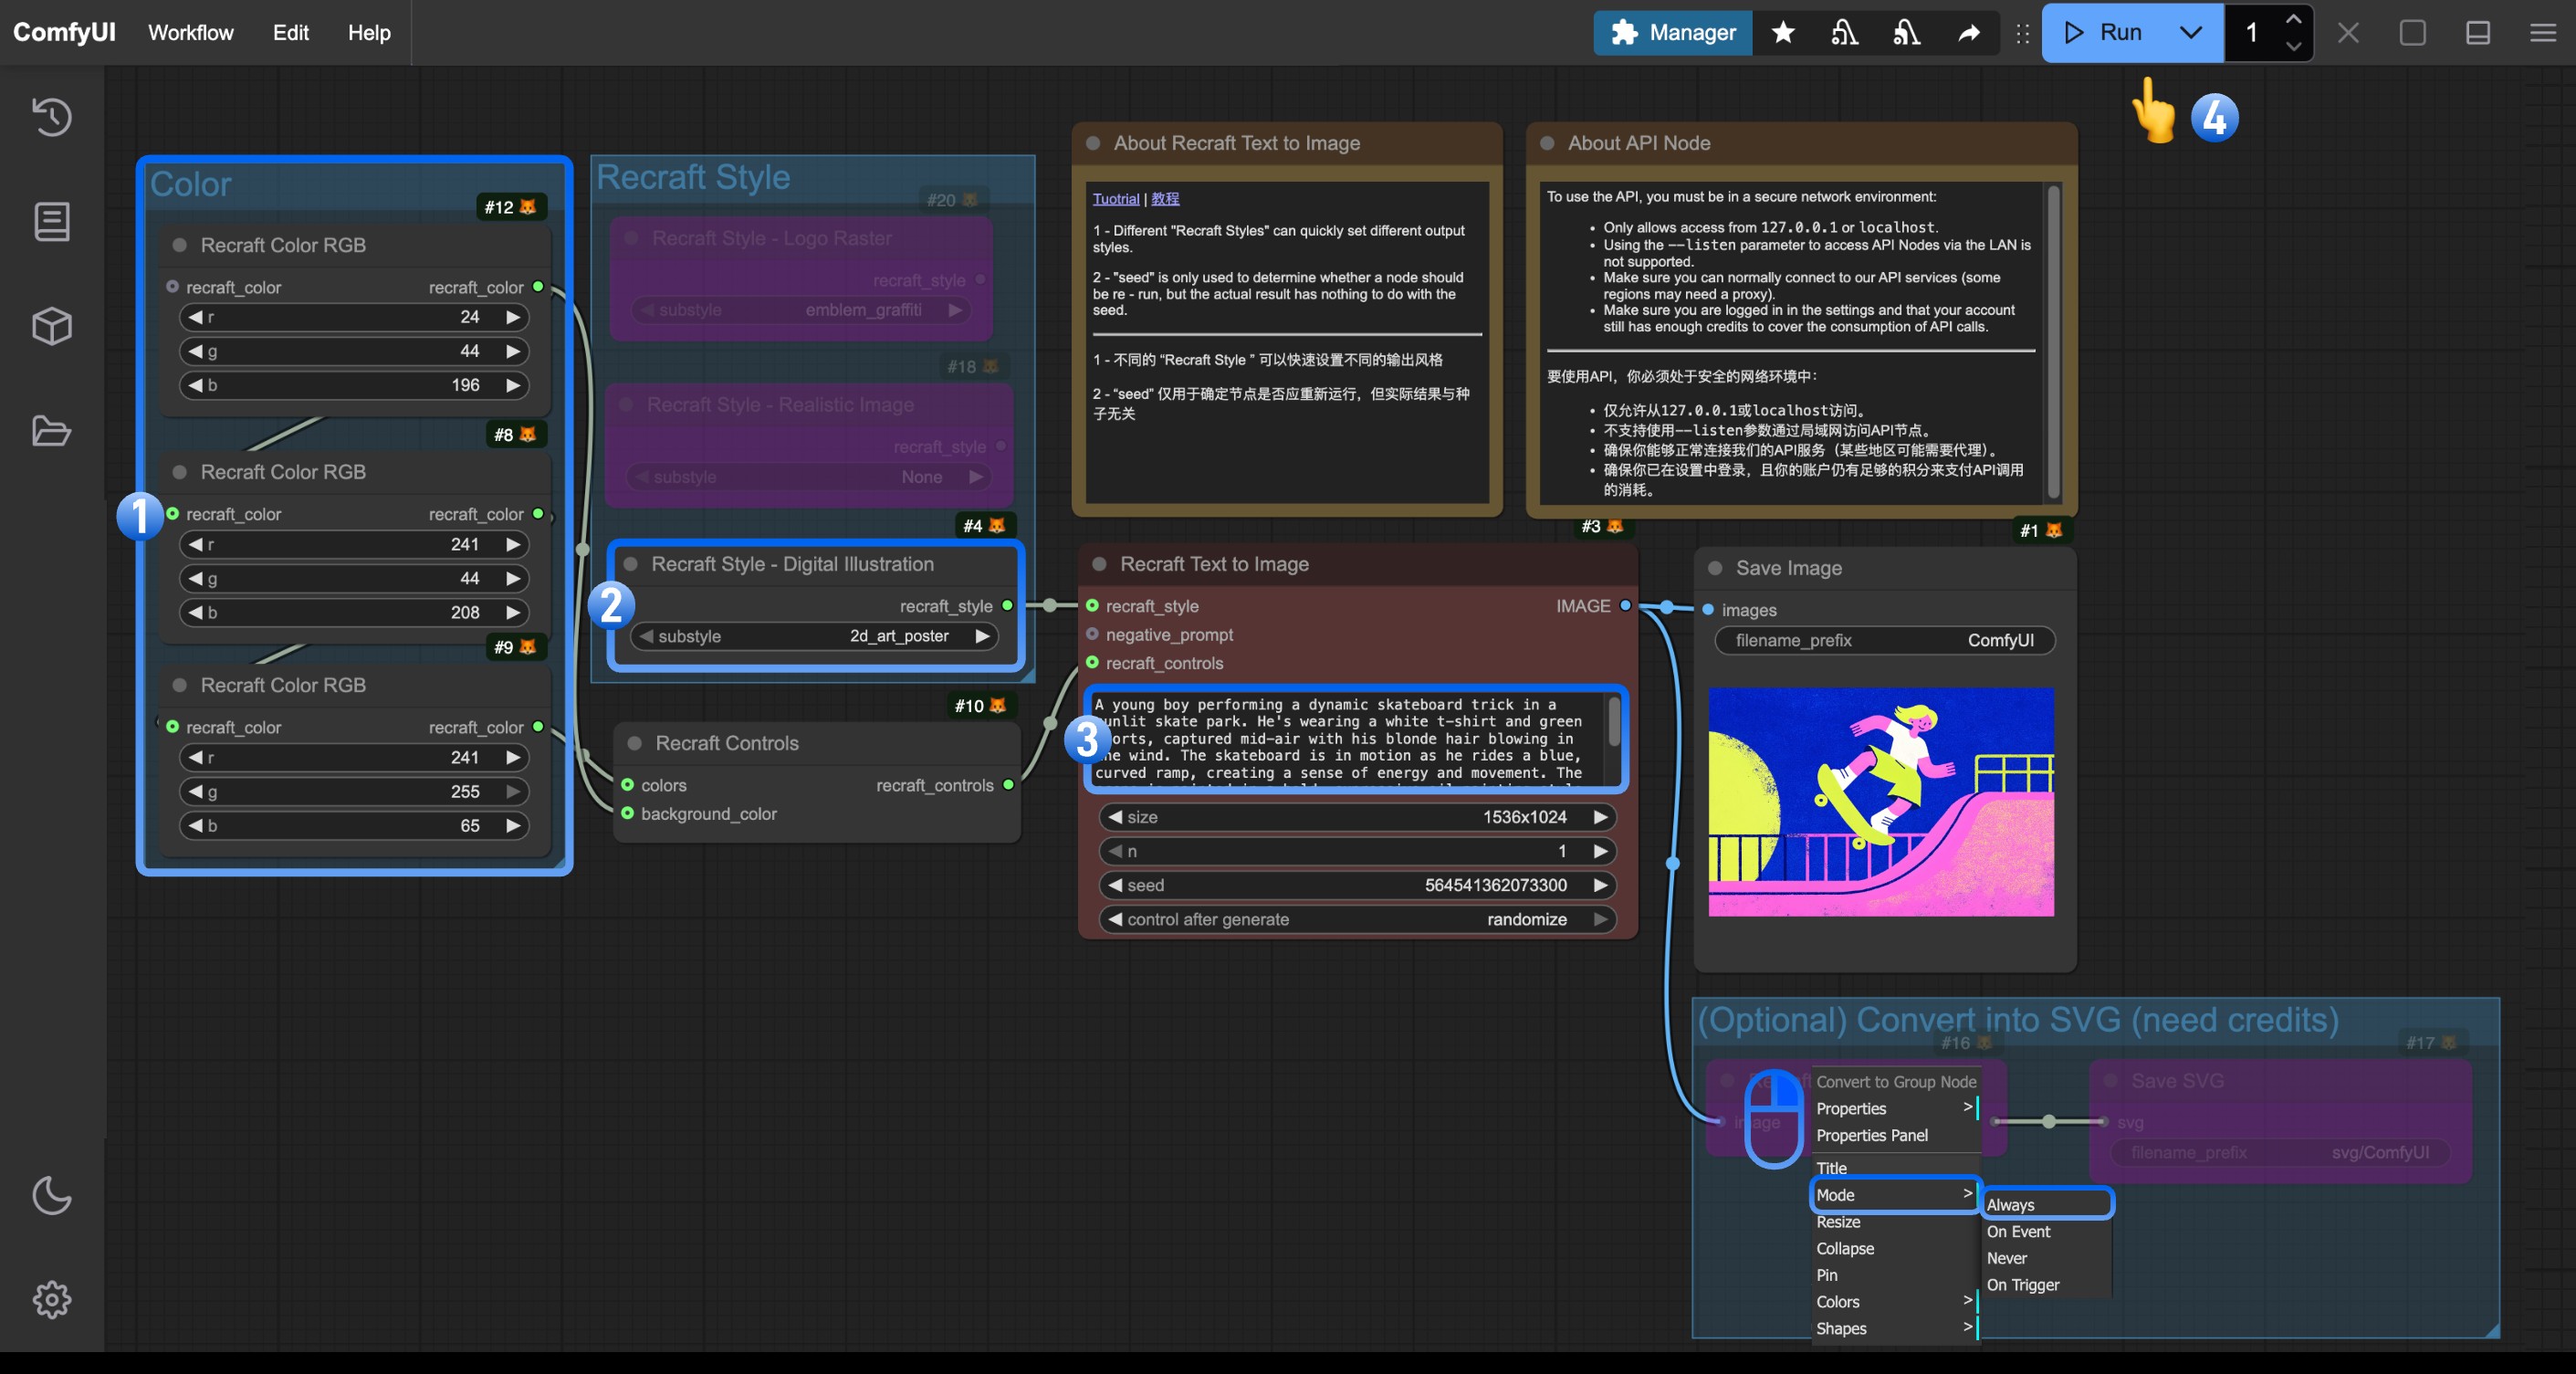
Follow these numbered steps to run the basic workflow:
1. (Optional) Change the `Recraft Color RGB` in the `Color` node to your desired color
2. (Optional) Modify the `Recraft Style` node to control the visual style, such as digital art, realistic photo, or logo design. This group includes other style nodes you can enable as needed
3. (Optional) Edit the `prompt` parameter in the `Recraft Text to Image` node. You can also change the `size` parameter
4. Click the `Run` button or use the shortcut `Ctrl(cmd) + Enter` to generate the image
5. After the API returns the result, you can view the generated image in the `Save Image` node. The image will also be saved to the `ComfyUI/output/` directory
> (Optional) We've included a **Convert to SVG** group in the workflow. Since the `Recraft Vectorize Image` node in this group consumes additional credits, enable it only when you need to convert the generated image to SVG format
### 3. Additional Notes
* **Recraft Style**: Offers various preset styles like realistic photos, digital art, and logo designs
* **Seed Parameter**: Only used to determine if the node should run again, the actual generation result is not affected by the seed value
## Related Node Documentation
Check the following documentation for detailed parameter settings of the nodes
Documentation for the Recraft Text to Image API node
Documentation for the Recraft Style - Realistic Image API node
Documentation for the Recraft Controls API node