> ## Documentation Index
> Fetch the complete documentation index at: https://dripart-train-lora-docs.mintlify.site/llms.txt
> Use this file to discover all available pages before exploring further.

# Rodin API Node Model Generation ComfyUI Official Example

> This article will introduce how to use Rodin node's API in ComfyUI for model generation

Hyper3D Rodin (hyper3d.ai) is a platform focused on rapidly generating high-quality, production-ready 3D models and materials through artificial intelligence.
ComfyUI has now natively integrated the corresponding Rodin model generation API, allowing you to conveniently use the related nodes in ComfyUI for model generation.

Currently, ComfyUI's API nodes support the following Rodin model generation capabilities:

* Single-view model generation
* Multi-view model generation
* Model generation with different levels of detail

<Tip>
  To use the API nodes, you need to ensure that you are logged in properly and using a permitted network environment. Please refer to the [API Nodes Overview](/tutorials/api-nodes/overview) section of the documentation to understand the specific requirements for using the API nodes.
</Tip>

<Tip>
  If you find missing nodes when loading the workflow file below, it may be due to the following situations:

  1. You are not using the latest Development (Nightly) version of ComfyUI.
  2. You are using the Stable (Release) version or Desktop version of ComfyUI (which does not include the latest feature updates).
  3. You are using the latest Commit version of ComfyUI, but some nodes failed to import during startup.

  Please make sure you have successfully updated ComfyUI to the latest Development (Nightly) version. See: [How to Update ComfyUI](/installation/update_comfyui) section to learn how to update ComfyUI.
</Tip>

## Single-view Model Generation Workflow

### 1. Workflow File Download

Download the file below and drag it into ComfyUI to load the corresponding workflow.

<a className="prose" target="_blank" href="https://raw.githubusercontent.com/Comfy-Org/example_workflows/refs/heads/main/api_nodes/rodin/rodin_image_to_model.json" style={{ display: 'inline-block', backgroundColor: '#0078D6', color: '#ffffff', padding: '10px 20px', borderRadius: '8px', borderColor: "transparent", textDecoration: 'none', fontWeight: 'bold'}}>
  <p className="prose" style={{ margin: 0, fontSize: "0.8rem" }}>Download Json Format Workflow File</p>
</a>

Download the image below as input image

![Input Image](https://raw.githubusercontent.com/Comfy-Org/example_workflows/refs/heads/main/api_nodes/rodin/doll.jpg)

### 2. Complete the Workflow Execution Step by Step
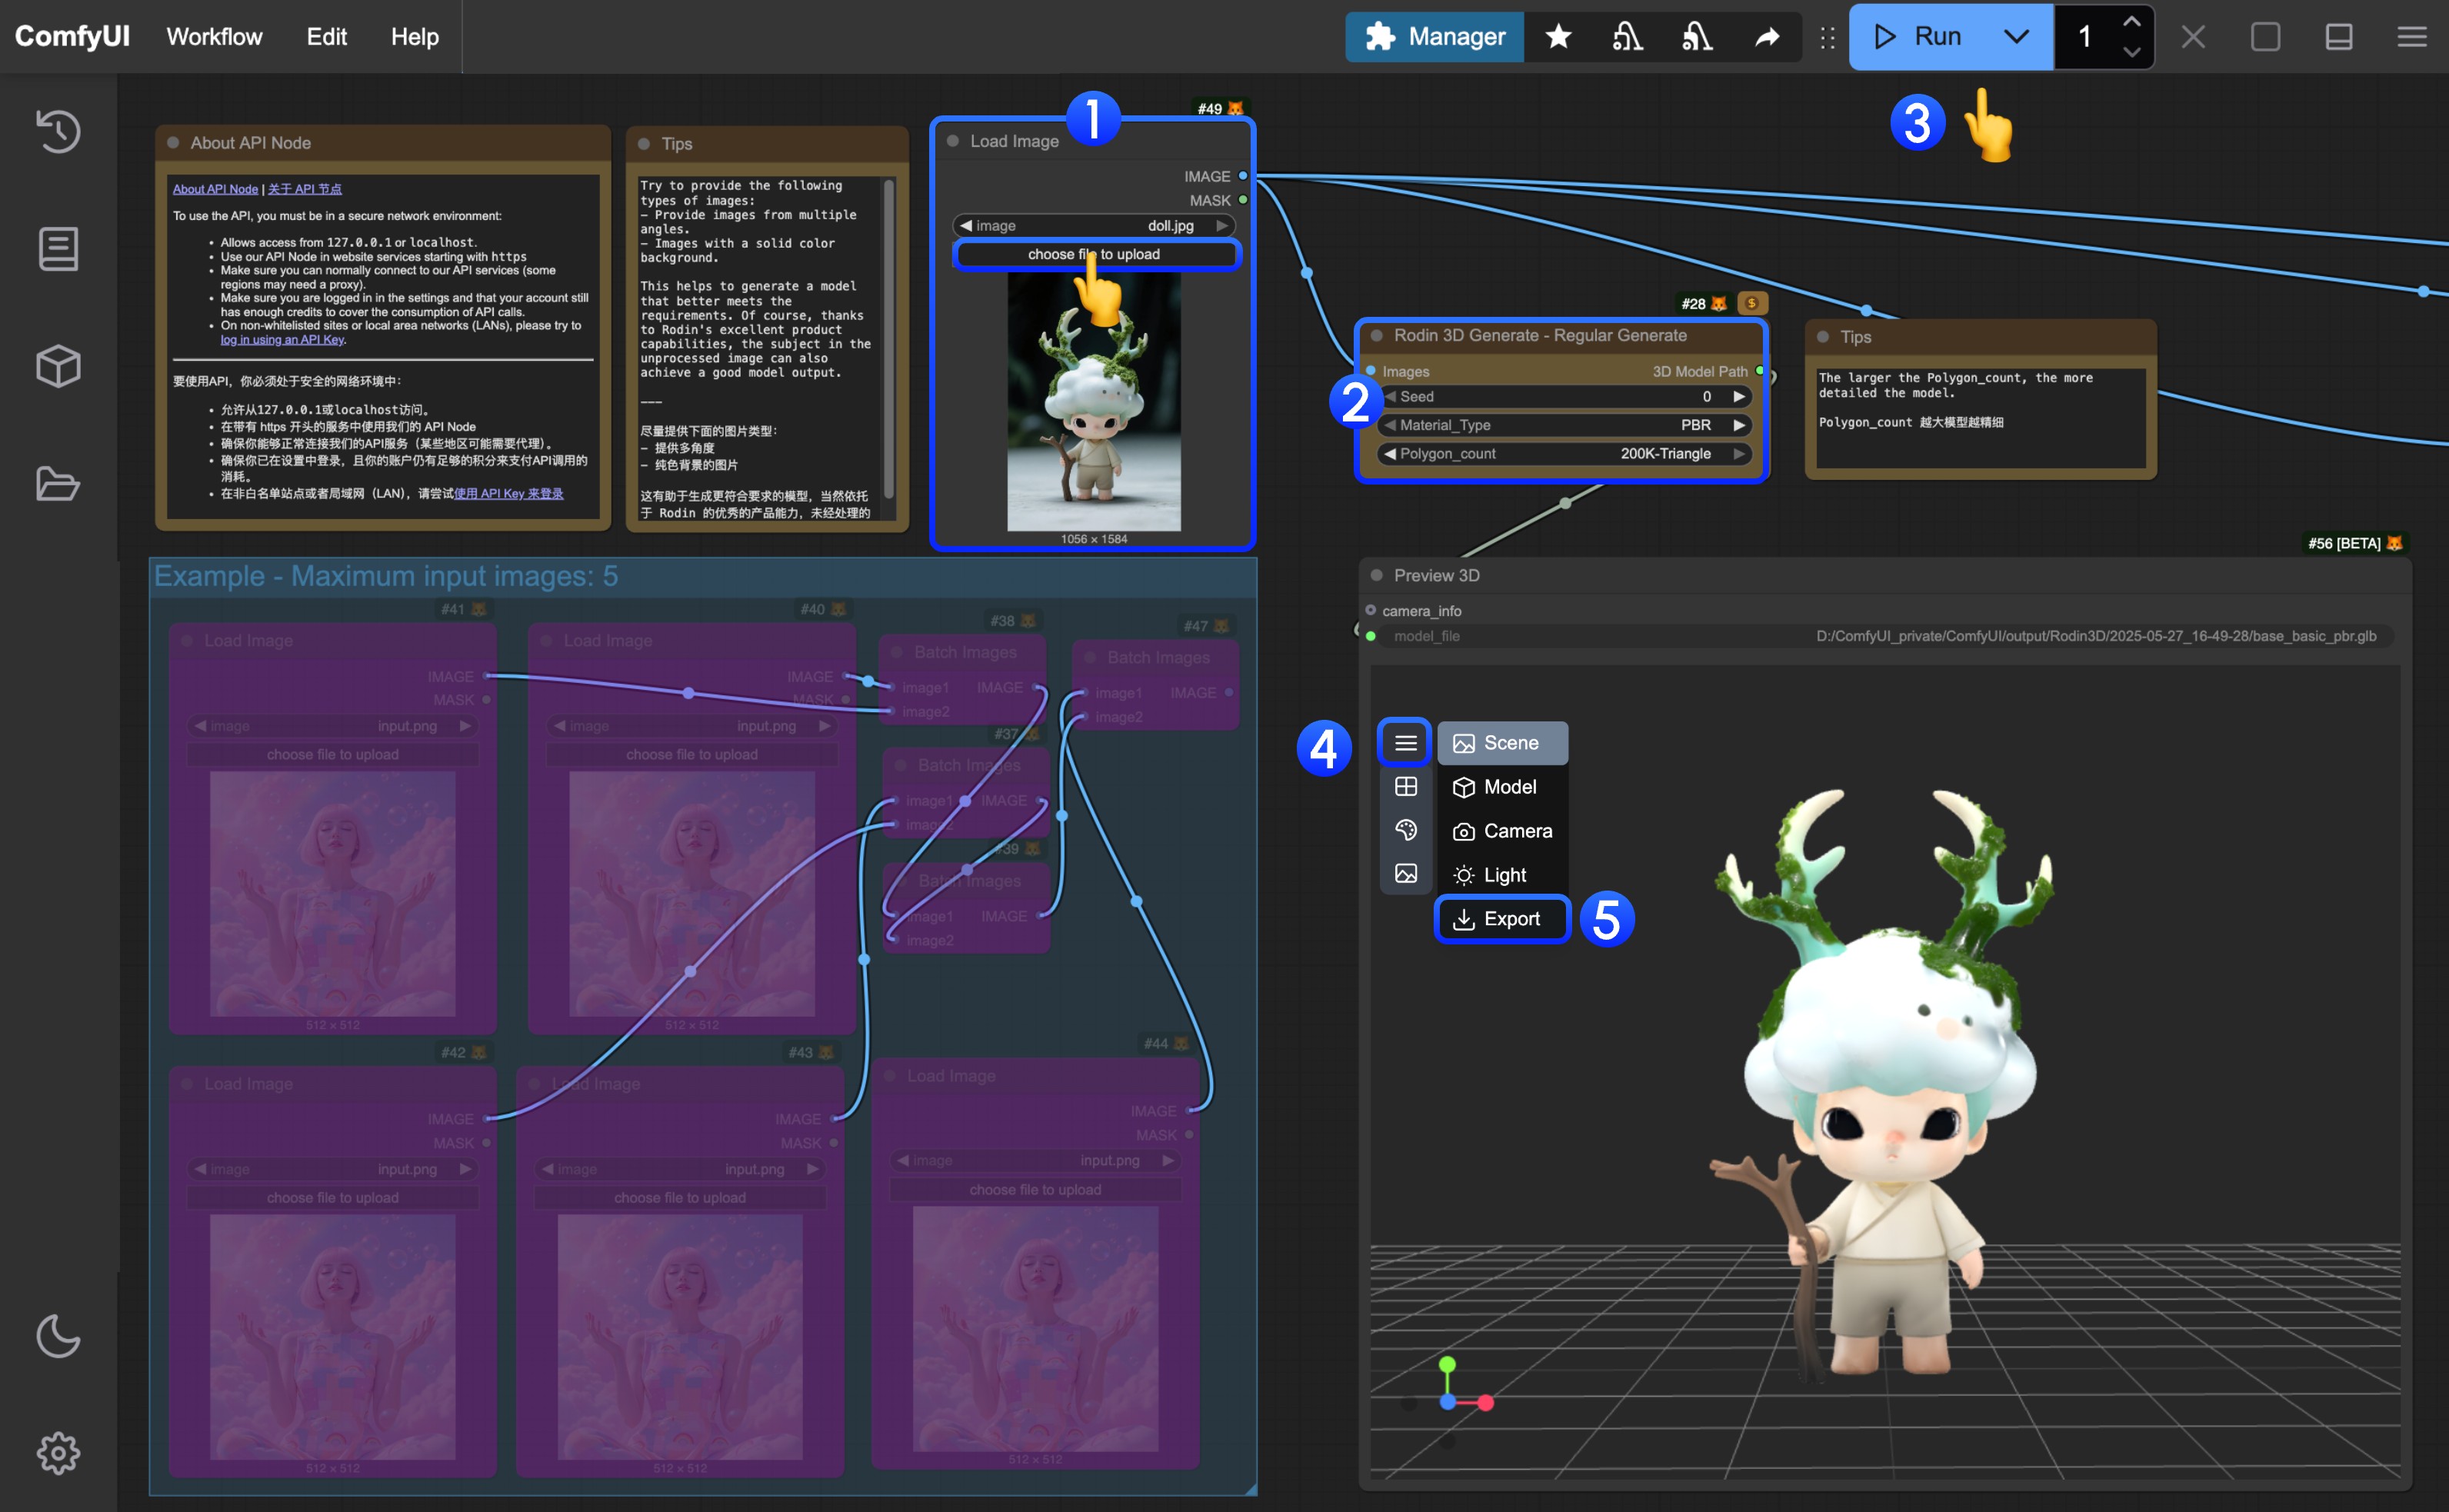
![ComfyUI Rodin Image to Model Step Guide](https://mintlify.s3.us-west-1.amazonaws.com/dripart-train-lora-docs/images/tutorial/api_nodes/rodin/rodin_image_to_model_step_guide.jpg)

You can refer to the numbers in the image to complete the basic text-to-image workflow execution:

1. In the `Load Image` node, load the provided input image
2. (Optional) In `Rodin 3D Generate - Regular Generate` adjust the corresponding parameters
   * polygon\_count: You can set different polygon counts, the higher the value, the smoother and more detailed the model
3. Click the `Run` button, or use the shortcut `Ctrl(cmd) + Enter` to execute model generation. After the workflow completes, the corresponding model will be automatically saved to the `ComfyUI/output/Rodin` directory
4. In the `Preview 3D` node, click to expand the menu
5. Select `Export` to directly export the corresponding model

## Multi-view Model Generation Workflow

The corresponding `Rodin 3D Generate - Regular Generate` allows up to 5 image inputs

### 1. Workflow File Download

You can modify the single-view workflow to a multi-view workflow, or directly download the workflow file below

Download the file below and drag it into ComfyUI to load the corresponding workflow.

<a className="prose" target="_blank" href="https://raw.githubusercontent.com/Comfy-Org/example_workflows/refs/heads/main/api_nodes/rodin/multiview_to_model/api_rodin_multiview_to_model.json" style={{ display: 'inline-block', backgroundColor: '#0078D6', color: '#ffffff', padding: '10px 20px', borderRadius: '8px', borderColor: "transparent", textDecoration: 'none', fontWeight: 'bold'}}>
  <p className="prose" style={{ margin: 0, fontSize: "0.8rem" }}>Download Json Format Workflow File</p>
</a>

Download the images below as input images

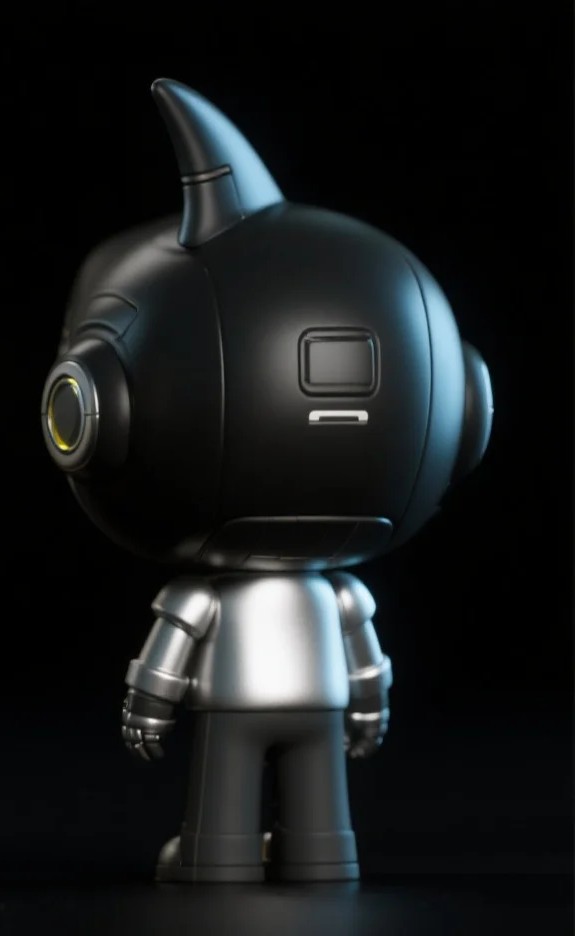
![Input Image](https://raw.githubusercontent.com/Comfy-Org/example_workflows/refs/heads/main/api_nodes/rodin/multiview_to_model/front.jpg)
![Input Image](https://raw.githubusercontent.com/Comfy-Org/example_workflows/refs/heads/main/api_nodes/rodin/multiview_to_model/back.jpg)
![Input Image](https://raw.githubusercontent.com/Comfy-Org/example_workflows/refs/heads/main/api_nodes/rodin/multiview_to_model/left.jpg)

### 2. Complete the Workflow Execution Step by Step
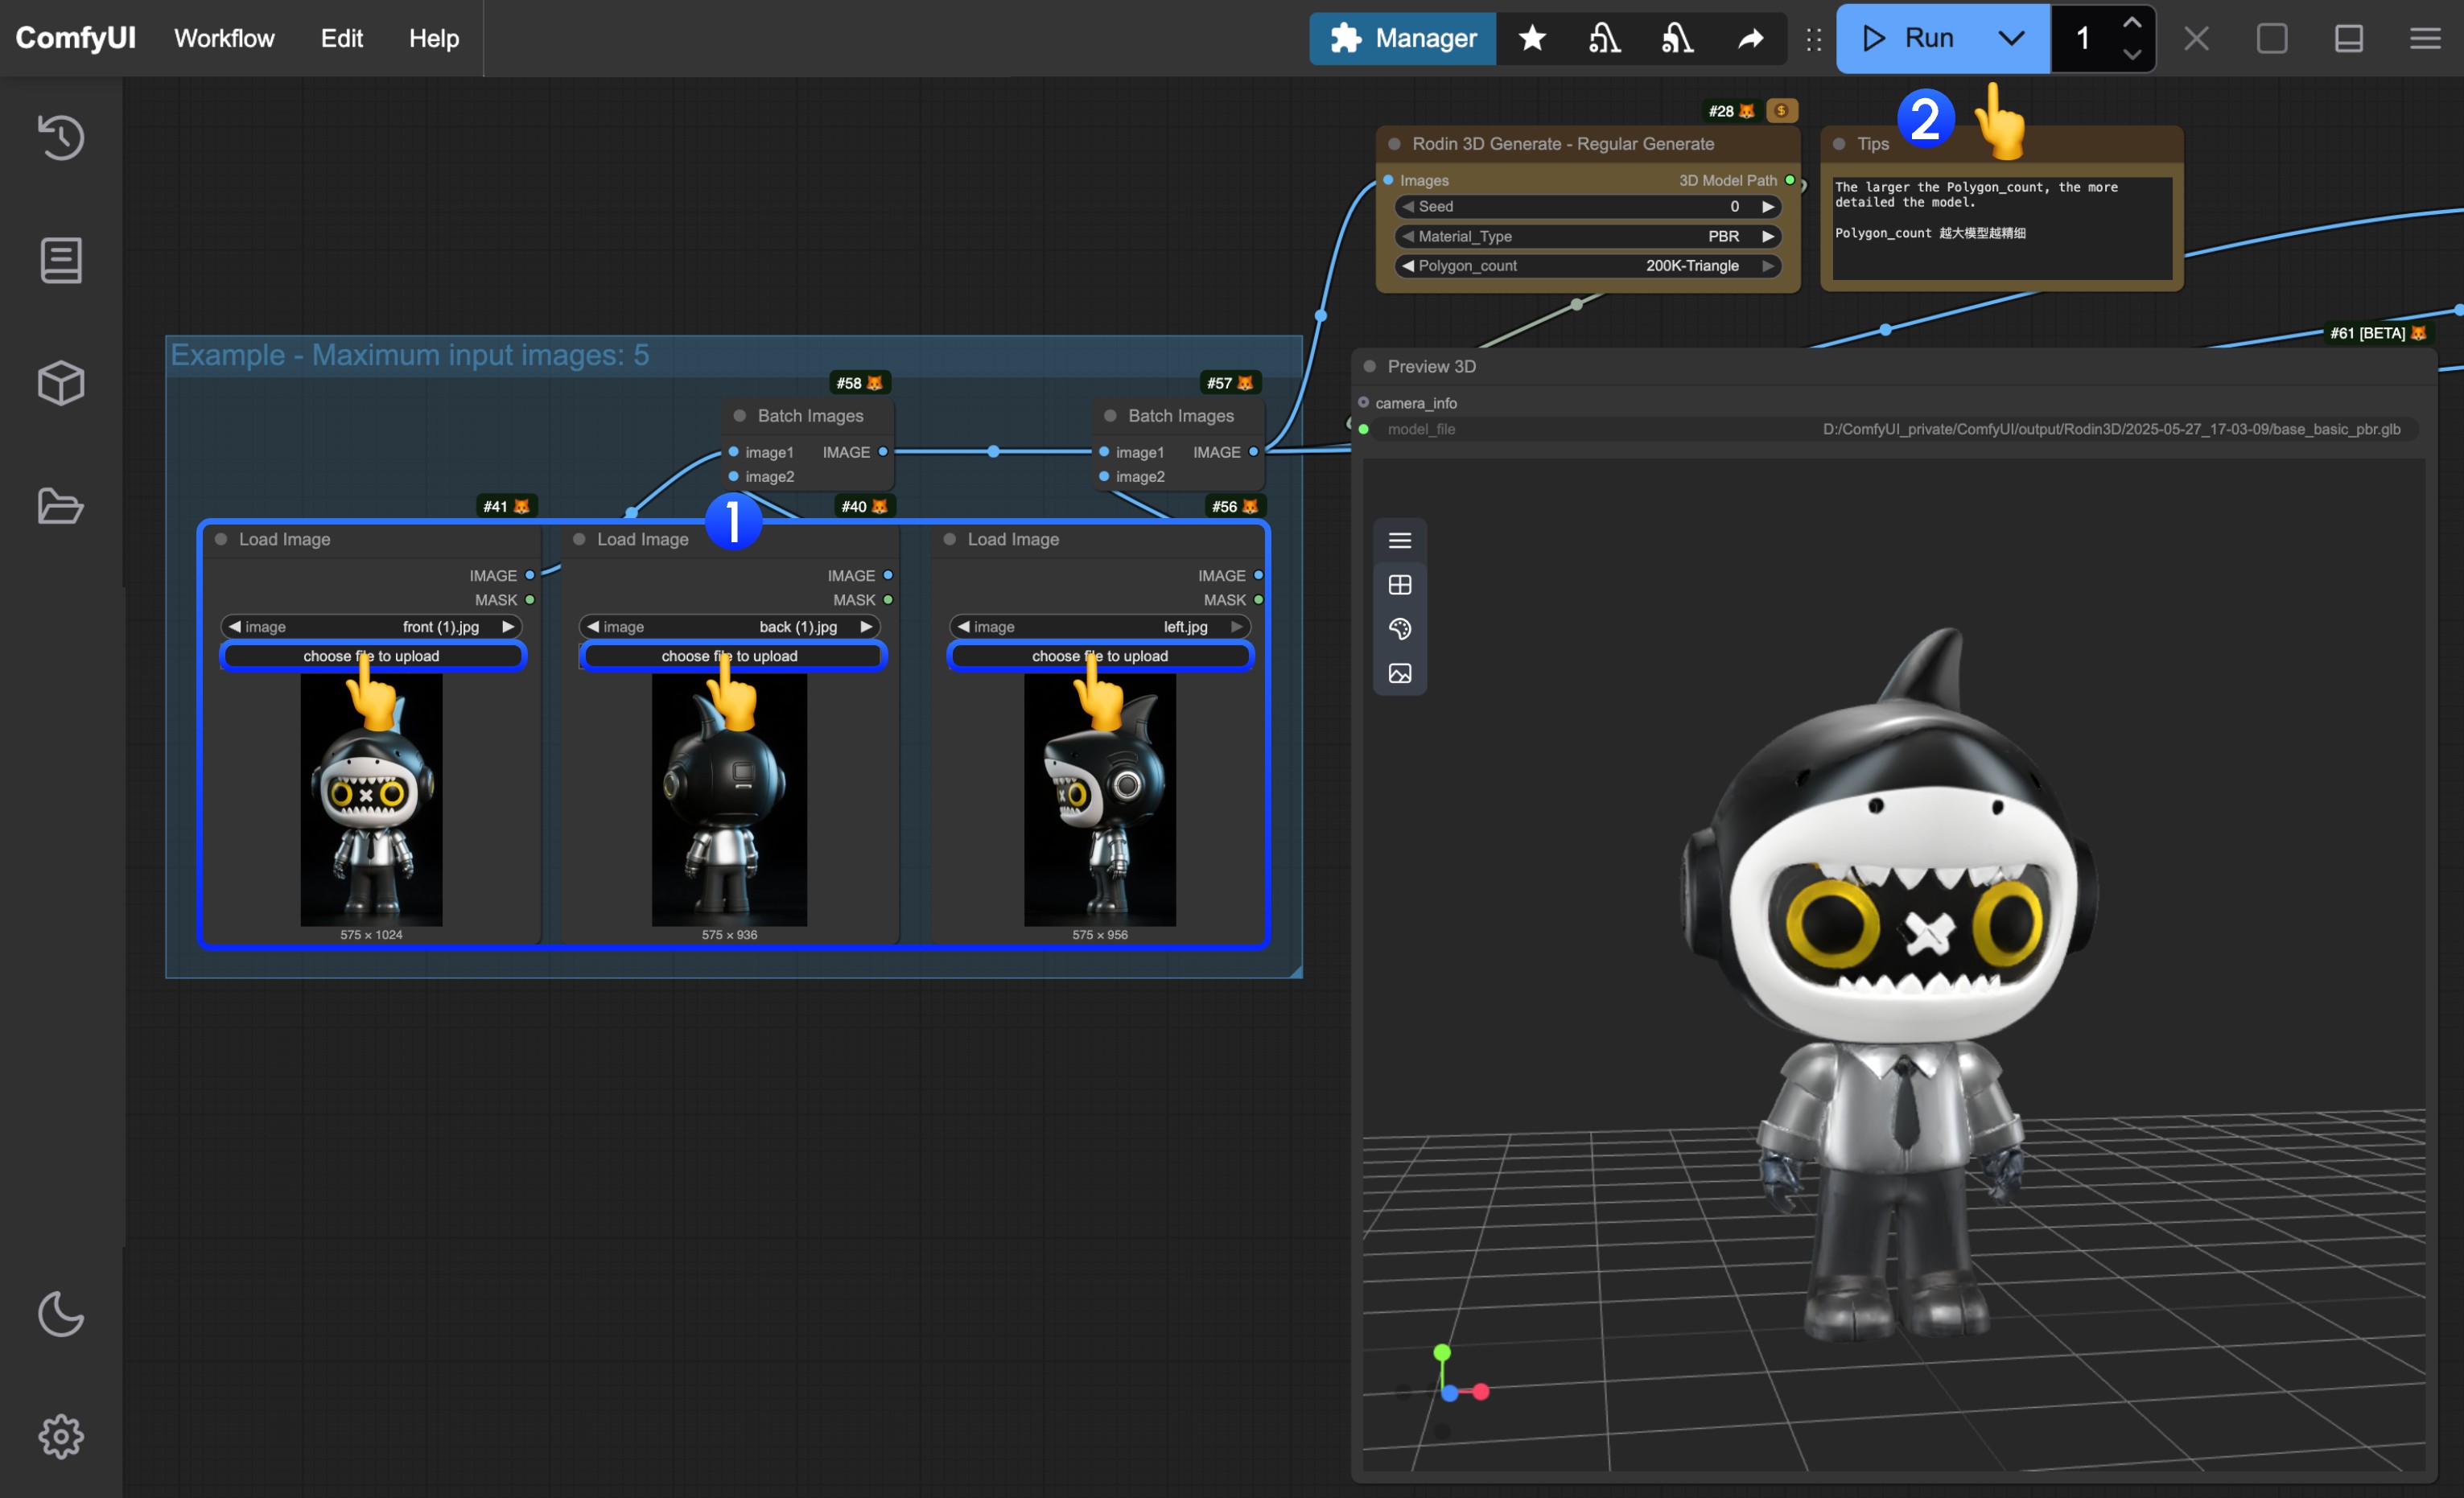
![ComfyUI Rodin Image to Model Step Guide](https://mintlify.s3.us-west-1.amazonaws.com/dripart-train-lora-docs/images/tutorial/api_nodes/rodin/rodin_multiview_to_model_step_guide.jpg)

You can refer to the numbers in the image to complete the basic text-to-image workflow execution:

1. In the `Load Image` node, load the provided input images
2. Click the `Run` button, or use the shortcut `Ctrl(cmd) + Enter` to execute model generation. After the workflow completes, the corresponding model will be automatically saved to the `ComfyUI/output/Rodin` directory
3. In the `Preview 3D` node, click to expand the menu
4. Select `Export` to directly export the corresponding model

## Other Related Nodes

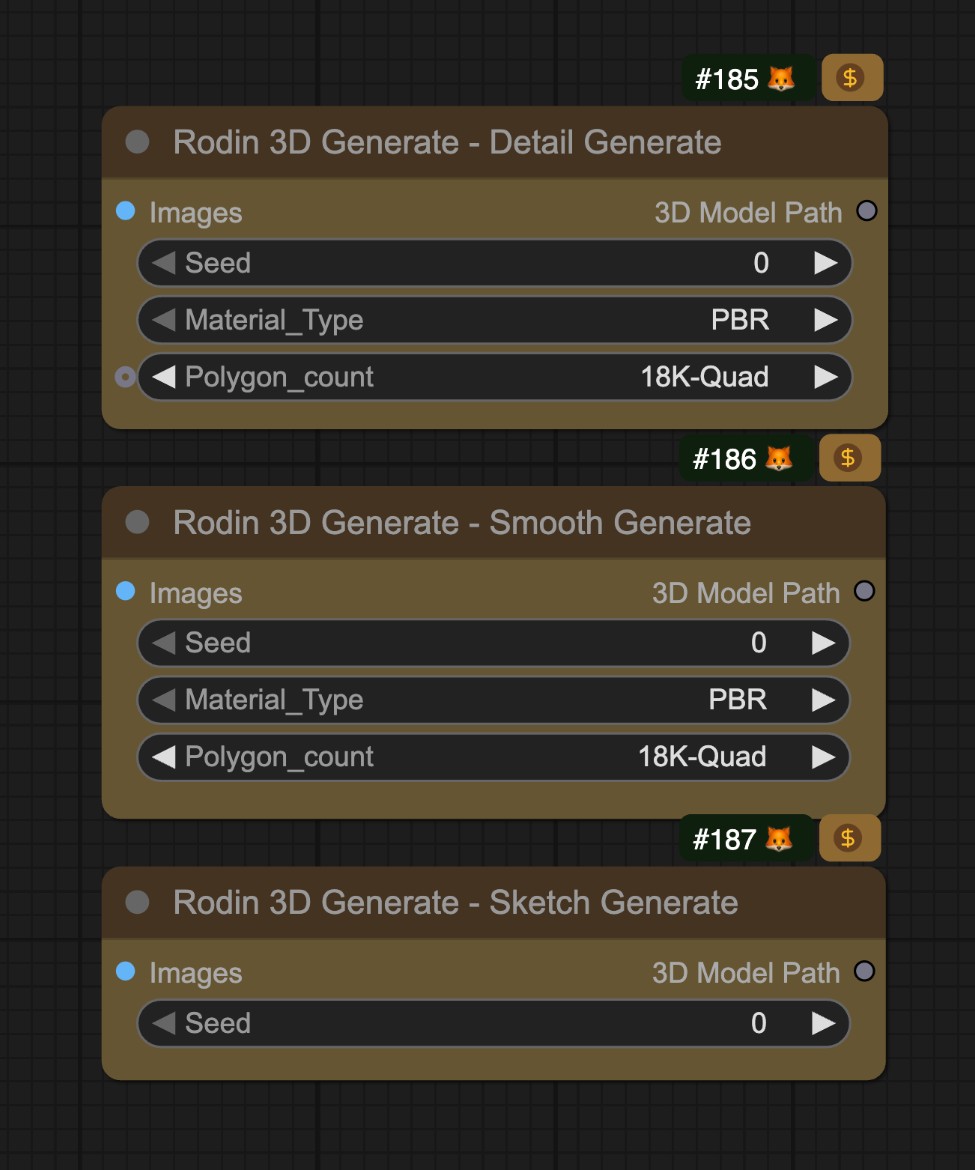
Currently, Rodin provides different types of model generation nodes in ComfyUI, since the corresponding input conditions are the same as the workflow introduced in this article, you can enable them as needed. In addition, we have provided corresponding nodes in the corresponding templates, you can also modify the corresponding node mode as needed to enable them
![Rodin Other Related Nodes](https://mintlify.s3.us-west-1.amazonaws.com/dripart-train-lora-docs/images/tutorial/api_nodes/rodin/other_nodes.jpg)