> ## Documentation Index
> Fetch the complete documentation index at: https://dripart-train-lora-docs.mintlify.site/llms.txt
> Use this file to discover all available pages before exploring further.
# 便携版(Windows)
> 本篇教程将指导你如何下载和开始使用 ComfyUI Portable(便携版) 并运行对应的程序
**ComfyUI Portable(便携版)** 是一个独立封装完整的 ComfyUI Windows 版本,内部已经整合了 ComfyUI 运行所需的独立的 **Python(python\_embeded)**,只需要解压即可使用,目前便携版本支持通过 **Nvidia** 显卡或者 **CPU** 运行。
本部分指南将引导你完成对应的安装。
## 下载 ComfyUI Portable(便携版)
您可通过点击下面的链接来获取最新的 **ComfyUI Portable(便携版)** 下载链接
下载 ComfyUI Portable(便携版)
下载后你可以使用类似解压软件如 [7-ZIP](https://7-zip.org/) 对压缩包进行解压
便携版解压后对应的文件结构及说明如下:
```
ComfyUI_windows_portable
├── 📂ComfyUI // ComfyUI 程序主体
├── 📂python_embeded // 独立的 Python 环境
├── 📂update // 用于升级便携版安装包的批处理脚本
├── README_VERY_IMPORTANT.txt // 英文版本的 ComfyUI 便携版使用说明
├── run_cpu.bat // 双击启动 ComfyUI(仅支持 CPU)
└── run_nvidia_gpu.bat // 双击启动 ComfyUI(仅支持 Nvidia 显卡)
```
## 如何启动 ComfyUI
根据你的电脑情况双击 `run_nvidia_gpu.bat ` 或者 `run_cpu.bat` 来启动 ComfyUI,你会看到对应下图所示的命令的运行
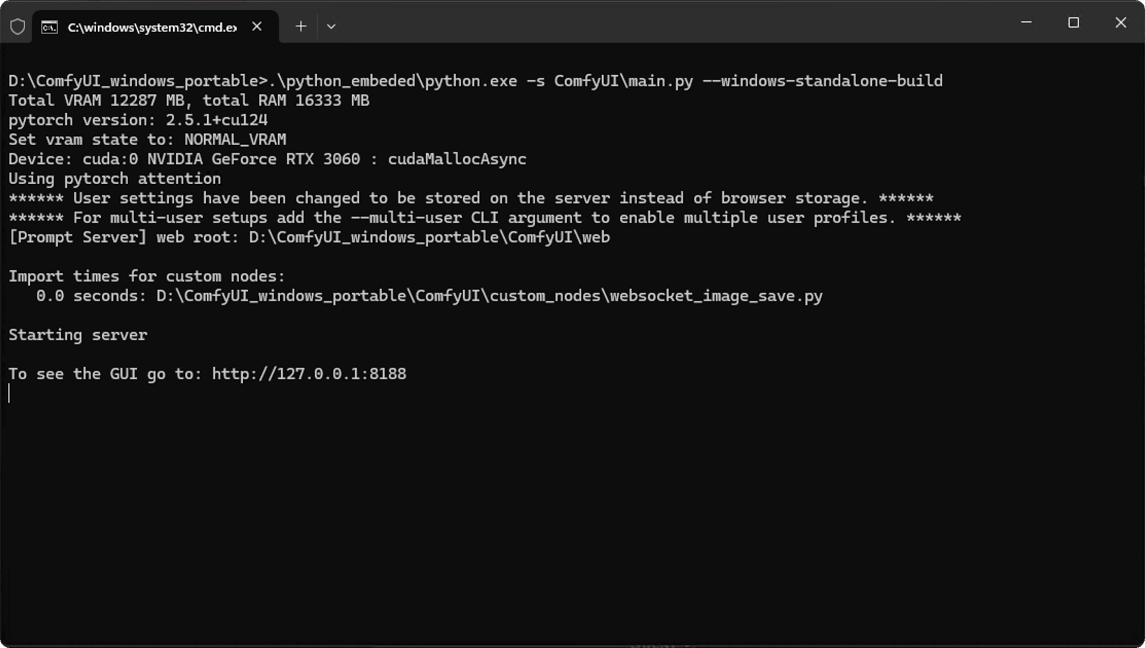
当你看到类似图片中的
```
To see the GUI go to: http://127.0.0.1:8188
```
此时你的 ComfyUI 服务已经启动,正常情况下 ComfyUI 会自动打开你的默认浏览器并访问 `http://127.0.0.1:8188` 地址,如果没有自动打开,请手动打开浏览器并访问该地址。
使用过程中请不要关闭对应的命令行窗口,否则 ComfyUI 将会停止运行
## 进行第一次图片生成
安装成功后,你可以参考访问下面的章节,开始你的 ComfyUI 之路。
本教程将引导你完成第一次的模型安装以及对应的文本到图片的生成
## 其它 ComfyUI 便携版相关说明
### 1. ComfyUI 便携版升级
你可以使用 **update** 文件夹下的相关批处理命令完成 ComfyUI 便携版的升级
```
ComfyUI_windows_portable
└─ 📂update
├── update.py
├── update_comfyui.bat // 更新 ComfyUI 到最新的 Commit 版本
├── update_comfyui_and_python_dependencies.bat // 请仅在你的运行环境存在问题时使用
└── update_comfyui_stable.bat // 更新 ComfyUI 为最新的 stable 版本
```
### 2. ComfyUI 模型共享或自定义模型文件夹存储位置配置
如果你同时有使用 [A1111](https://github.com/AUTOMATIC1111/stable-diffusion-webui) 或者想要自定义模型存储位置,你可以通过修改下面的文件来完成配置
```
ComfyUI_windows_portable
└─ 📂ComfyUI
└── extra_model_paths.yaml.example // 此文件为配置模板
```
请复制 `extra_model_paths.yaml.example` 并重命名为 `extra_model_paths.yaml`
下面是对应的原始配置文件内容
```yaml
#Rename this to extra_model_paths.yaml and ComfyUI will load it
#config for a1111 ui
#all you have to do is change the base_path to where yours is installed
a111:
base_path: path/to/stable-diffusion-webui/
checkpoints: models/Stable-diffusion
configs: models/Stable-diffusion
vae: models/VAE
loras: |
models/Lora
models/LyCORIS
upscale_models: |
models/ESRGAN
models/RealESRGAN
models/SwinIR
embeddings: embeddings
hypernetworks: models/hypernetworks
controlnet: models/ControlNet
#config for comfyui
#your base path should be either an existing comfy install or a central folder where you store all of your models, loras, etc.
#comfyui:
# base_path: path/to/comfyui/
# # You can use is_default to mark that these folders should be listed first, and used as the default dirs for eg downloads
# #is_default: true
# checkpoints: models/checkpoints/
# clip: models/clip/
# clip_vision: models/clip_vision/
# configs: models/configs/
# controlnet: models/controlnet/
# diffusion_models: |
# models/diffusion_models
# models/unet
# embeddings: models/embeddings/
# loras: models/loras/
# upscale_models: models/upscale_models/
# vae: models/vae/
#other_ui:
# base_path: path/to/ui
# checkpoints: models/checkpoints
# gligen: models/gligen
# custom_nodes: path/custom_nodes
```
比如你的 WebUI 位于 `D:\stable-diffusion-webui\ ` 下,你可以修改对应的配置为
```yaml
a111:
base_path: D:\stable-diffusion-webui\
checkpoints: models/Stable-diffusion
configs: models/Stable-diffusion
vae: models/VAE
loras: |
models/Lora
models/LyCORIS
upscale_models: |
models/ESRGAN
models/RealESRGAN
models/SwinIR
embeddings: embeddings
hypernetworks: models/hypernetworks
controlnet: models/ControlNet
```
这样类似 `D:\stable-diffusion-webui\models\Stable-diffusion\` 下的模型就可以被 ComfyUI 便携版检测到并使用,同样你也可以自定添加其它自定义模型位置配置
### 3. ComfyUI 便携版设置局域网访问
如果你的 ComfyUI 运行在局域网内,想要其它的设备也可以访问到 ComfyUI,你可以通过记事本修改 `run_nvidia_gpu.bat` 或者 `run_cpu.bat` 文件来完成配置,主要通过添加`--listen`来添加监听地址
下面的示例是添加了 `--listen` 参数的 `run_nvidia_gpu.bat` 文件命令
```bat
.\python_embeded\python.exe -s ComfyUI\main.py --listen --windows-standalone-build
pause
```
当启用 ComfyUI 后您会发现最后的运行地址会变为
```
Starting server
To see the GUI go to: http://0.0.0.0:8188
To see the GUI go to: http://[::]:8188
```
你可以通过 `WIN + R` 输入`cmd` 打开命令行,输入 `ipconfig` 来查看你的局域网 IP 地址,然后在其它设备上输入 `http://你的局域网IP:8188` 来访问 ComfyUI